前回、Arduino Cloud のアカウント登録のやり方を紹介しました。今回は、Arduino Cloudを使ってLEDをリモートからON/OFFする方法を簡単に紹介します。
完成したものがこちらです。
準備するもの
今回使用するものを一覧にまとめました。
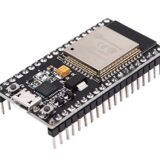
- ESP32
- 発行ダイオード
- 抵抗
- ジャンパー線
- ブレッドボード
- パソコン
- USBケーブル
です。
↓おすすめの商品↓

回路の作成
今回はLEDを光らせるだけなのでとても簡単な回路になります。以下が回路図です。

パソコンの設定
Arduino Cloudはブラウザベースです。なのでArduinoUNOなどに書き込むためのクライアントソフトをパソコンにインストールする必要があります。
まず、Arduino Create Agent をダウンロードします。以下のリンクからダウンロードできます。


サイトにアクセスしたら、「START」をクリックします。

そして、「DOWNLOAD」をクリックしてインストールファイルをダウンロードします。
ダウンロードしたファイルを実行します。パスワードを求められた場合はパスワードを入力して実行します。


「Next >」をクリックして次へ進みます。

ライセンス内容を読んで同意にチェックを入れて「Next >」をクリックします。

インストールする場所を指定します。基本的にデフォルトのままで大丈夫です。「Next >」をクリックします。

「Next >」をクリックするとインストールが開始されます。インストールが終わるまで待ちます。

「Finish」をクリックすればインストールは完了です。

ブラウザに戻り、「Next」をクリックします。

そして、「Go To Web Editor」をクリックするとArduinoのプログラムを書くことができるエディターサイトに飛びます。今回は使用しないので閉じて大丈夫です。
Arduino Cloudの設定
Arduino Cloudの設定を行います。Arduinoのサイトにアクセスします。


右上の囲ってある所から「Arduino Cloud」をクリックします。

そして、「Cloud apps」から「IoT Cloud」をクリックします。
プロジェクトの作成

プロジェクトを作成します。「CREATE THING」をクリックします。
Variable 変数の設定

「Variable」を追加します。「ADD VARIABLE」をクリックします。

クリックすると設定項目が出てくるので以下の画像を参考に設定してください。
Associated Device デバイスの登録

デバイスを登録します。「Associated Device」の下にある 🔗 マークをクリックします。

そして、「SET UP NEW DEVICE」をクリックします。
ここでデバイスを選択します。対応しているデバイスを以下にまとめました。
| Arduino デバイス | その他 |
| Arduino NANO 33 IoT | ESP8266 |
| Arduino MKR WiFi 1010 | ESP32 |
| Arduino MKR WAN 1310 | Pelion |
| Arduino MKR WAN 1300 | LoRaWAN device |
| Arduino MKR NB 1500 | |
| Arduino MKR GSM 1400 | |
| Arduino MKR1000 | |
| Arduino Portenta X8 | |
| Arduino Portenta H7 | |
| Opta | |
| Arduino Nicla Vision | |
| Arduino Nano RP2040 Connect | |
| Arduino Giga R1 | |
| Arduino Portenta X8 |

今回は、ESP32を使います。なので、「Set up a 3rd Party device」をクリックします。

そして、ESP32にチェックを入れて、選択の中から「ESP32 Dev Module」を選択し、「CONTINUE」をクリックします。

デバイス名を入力します。

デバイスIDとセキュリティキーが表示されるのでメモしておきます。メモを取ったらチェックを入れて「CONTINUE」をクリックします。

これでデバイスの登録ができました。
Network ネットワークの設定

ネットワークの設定をしていきます。「Network」の下にある 🔗 マークをクリックします。

SSID・Password・Secret Keyを入力します。入力したら「SAVE」をクリックします。

これで基本設定が終わりました。
Dashboardsの設定

ダッシュボードを設定していきます。上のバーから「Dashboards」→「BUILD DASHBOARD」をクリックします。

編集モードに変更し、「ADD」をクリックし、一覧の中から「Switch」をクリックします。

Nameを適当に設定します。そして、「Linked Variable」の 🔗 マークをクリックします。

先ほど作った「Variables」を選択し、「LINK VARIABLE」をクリックします。

「DONE」をクリックします。
プログラムの編集

プログラムを編集します。「Things」に移動し、先ほど作ったプロジェクトをクリックします。
「Sketch」に移動し、プログラムを編集します。黄色いマーカーの部分を追加します。赤いマーカーは作成した変数名によって違うので上の「bool」の行を確認して変更してください。
/*
  Sketch generated by the Arduino IoT Cloud Thing "Untitled"
  https://create.arduino.cc/cloud/things/a6611314-bdfa-46fa-b543-aaf3b5621422

  Arduino IoT Cloud Variables description

  The following variables are automatically generated and updated when changes are made to the Thing

  bool LEDSwitch;

  Variables which are marked as READ/WRITE in the Cloud Thing will also have functions
  which are called when their values are changed from the Dashboard.
  These functions are generated with the Thing and added at the end of this sketch.
*/

#include "thingProperties.h"

void setup() {
  // Initialize serial and wait for port to open:
  Serial.begin(9600);
  // This delay gives the chance to wait for a Serial Monitor without blocking if none is found
  delay(1500);

  // Defined in thingProperties.h
  initProperties();

  // Connect to Arduino IoT Cloud
  ArduinoCloud.begin(ArduinoIoTPreferredConnection);

  /*
     The following function allows you to obtain more information
     related to the state of network and IoT Cloud connection and errors
     the higher number the more granular information you’ll get.
     The default is 0 (only errors).
     Maximum is 4
 */
  setDebugMessageLevel(2);
  ArduinoCloud.printDebugInfo();
  pinMode(12, OUTPUT);
}

void loop() {
  ArduinoCloud.update();
  // Your code here


}


/*
  Since Switch is READ_WRITE variable, onSwitchChange() is
  executed every time a new value is received from IoT Cloud.
*/
void onSwitchChange()  {
  // Add your code here to act upon Switch change
  digitalWrite(12,LEDSwitch);
}
編集したプログラムを確認します。エディター左上の「☑️」をクリックします。エラーが出ないことを確認した上でESP32とパソコンを接続し、エディター左上の「➡️」をクリックして書き込みます。
書き込みでエラーが出る場合はブラウザの変更やパソコンにインストールしたソフトを確認することで解消される場合があります。
動作確認
一通り設定が終わったので動作確認をします。まず、ESP32がオンラインになっているか確認します。

「Devices」をクリックします。先ほど登録したデバイスが表示されるのでオンラインになっているか確認します。なかなかオンラインにならない場合は、ESP32の電源をOFF→ONにしたり、Networkの設定を見直したりしてください。
オンラインになったことを確認できたら「Dashboards」をクリックします。そしてSwitchを操作するとESP32に接続しているLEDが点灯したり消灯したりすると思います。
まとめ
今回は、Arduino Cloudを使ったLEDの遠隔制御(点灯/消灯)のやり方を紹介しました。

コメント